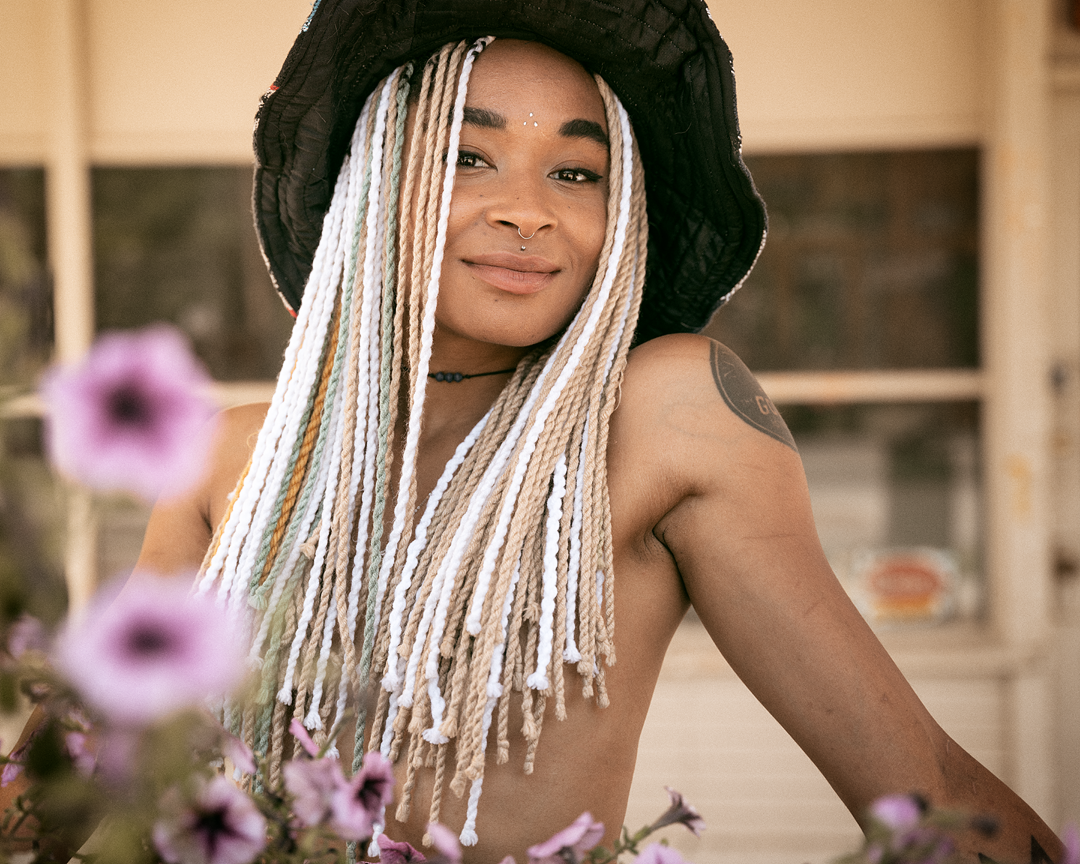
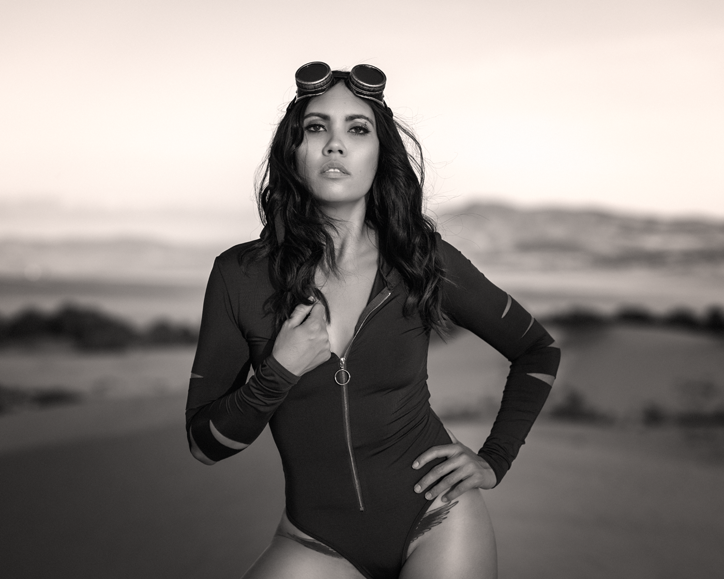
This Dusty Roads editorial with Shamir is a direct result that I very much dislike winter. In fact I spend all winter long waiting for summer. And then when the good weather is here I take a lot of pleasure in doing outdoor editorial fashion style shoots for no other reason than it’s fun.
Nah, I’m no fashion photographer. I’m just an enthusiast that receives much needed therapy by taking photos.
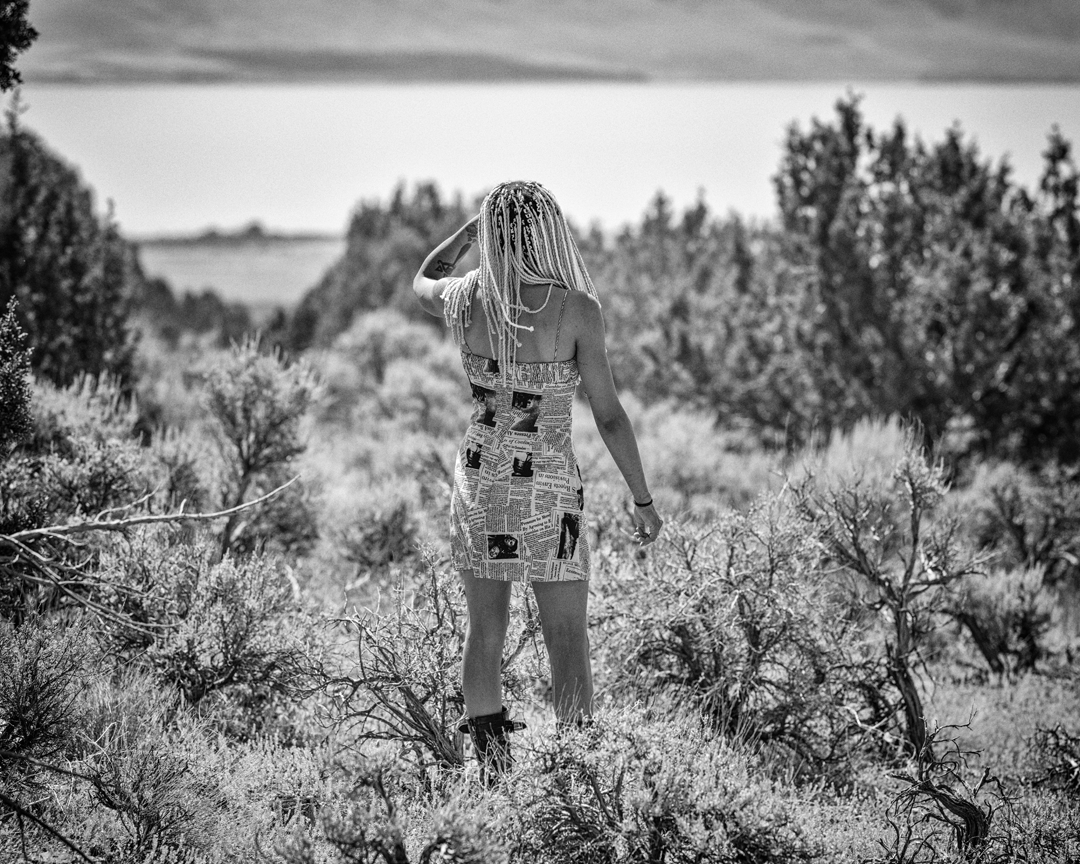
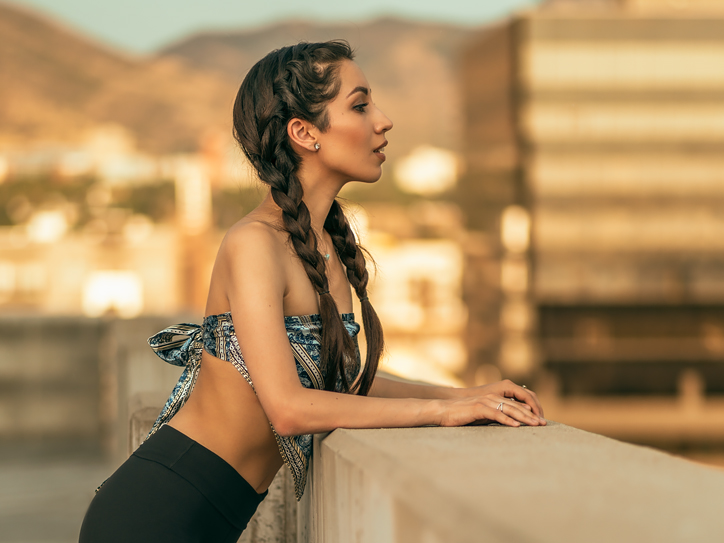
Shamir met me at my house in the morning, we had a cup of coffee, and then hit the road. The first stop was a great high desert location that overlooks a lake. Had to get a quick shot of Shamir admiring the view.
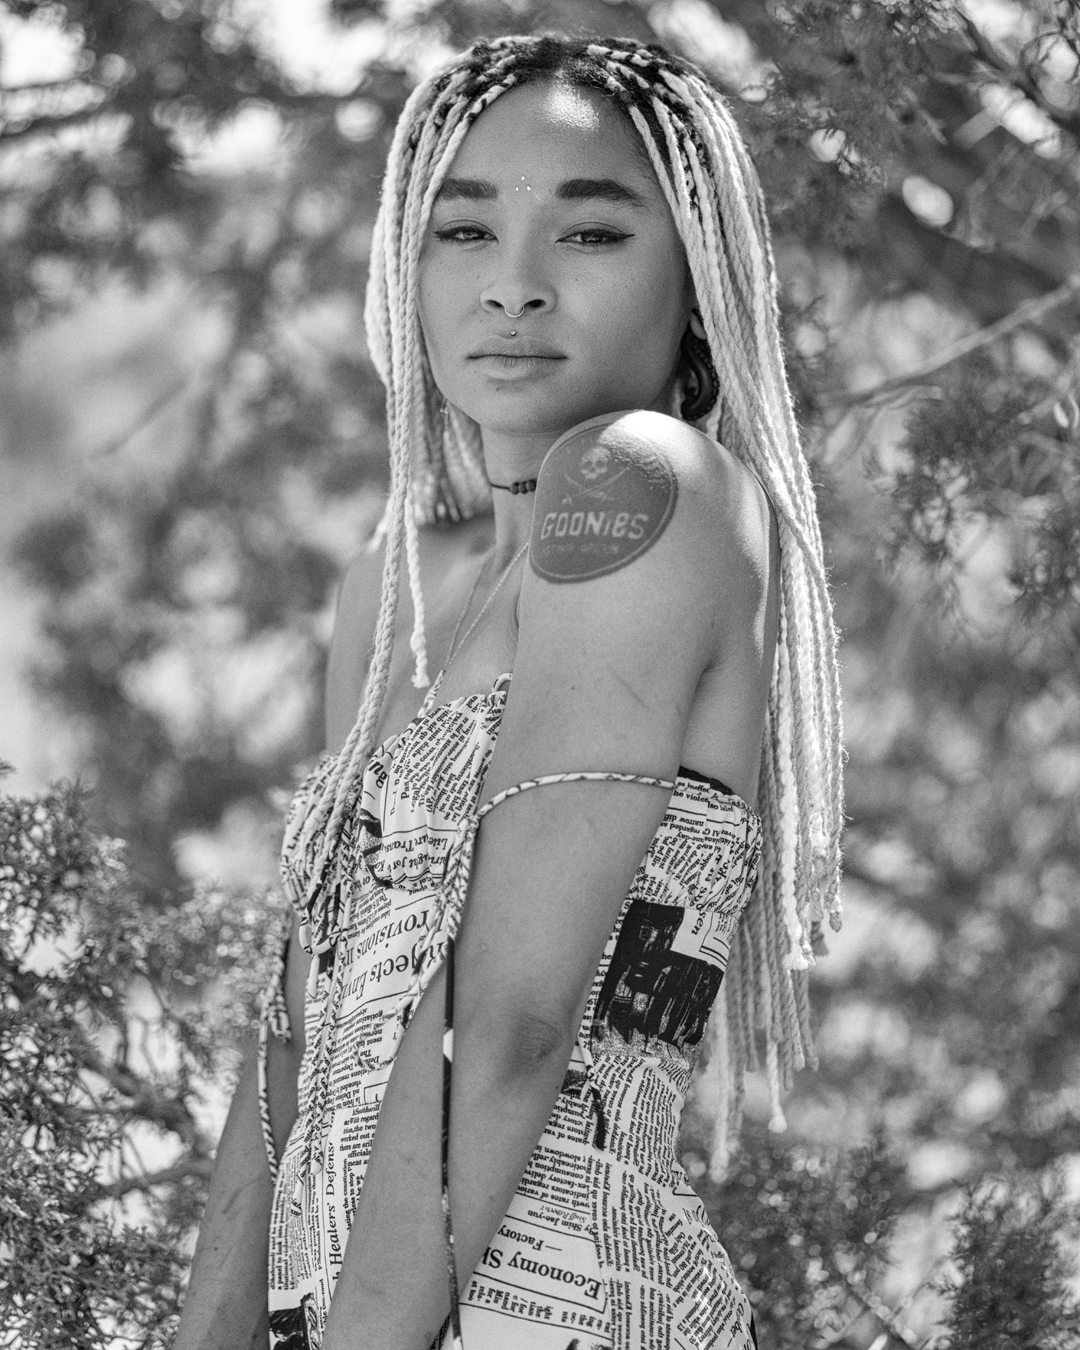
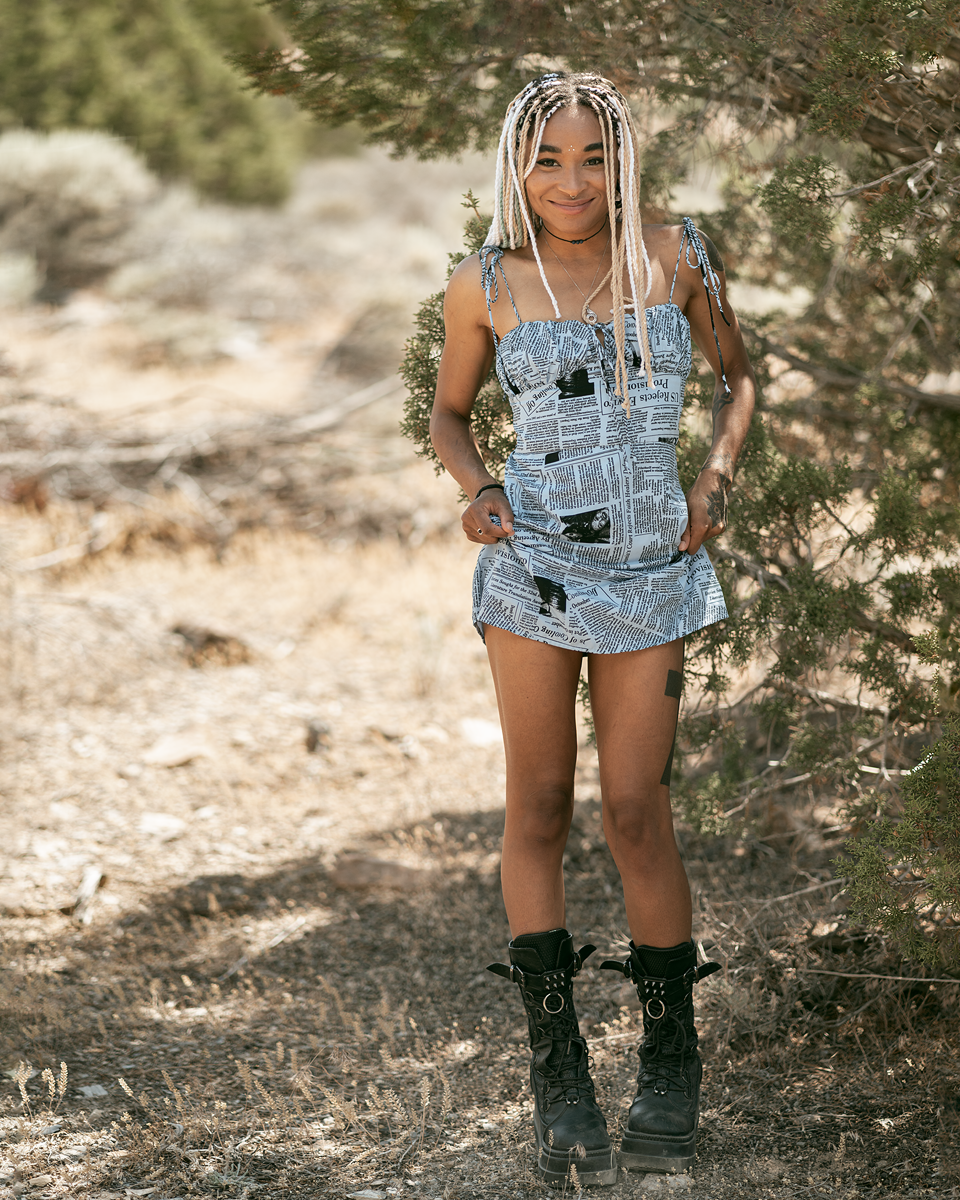
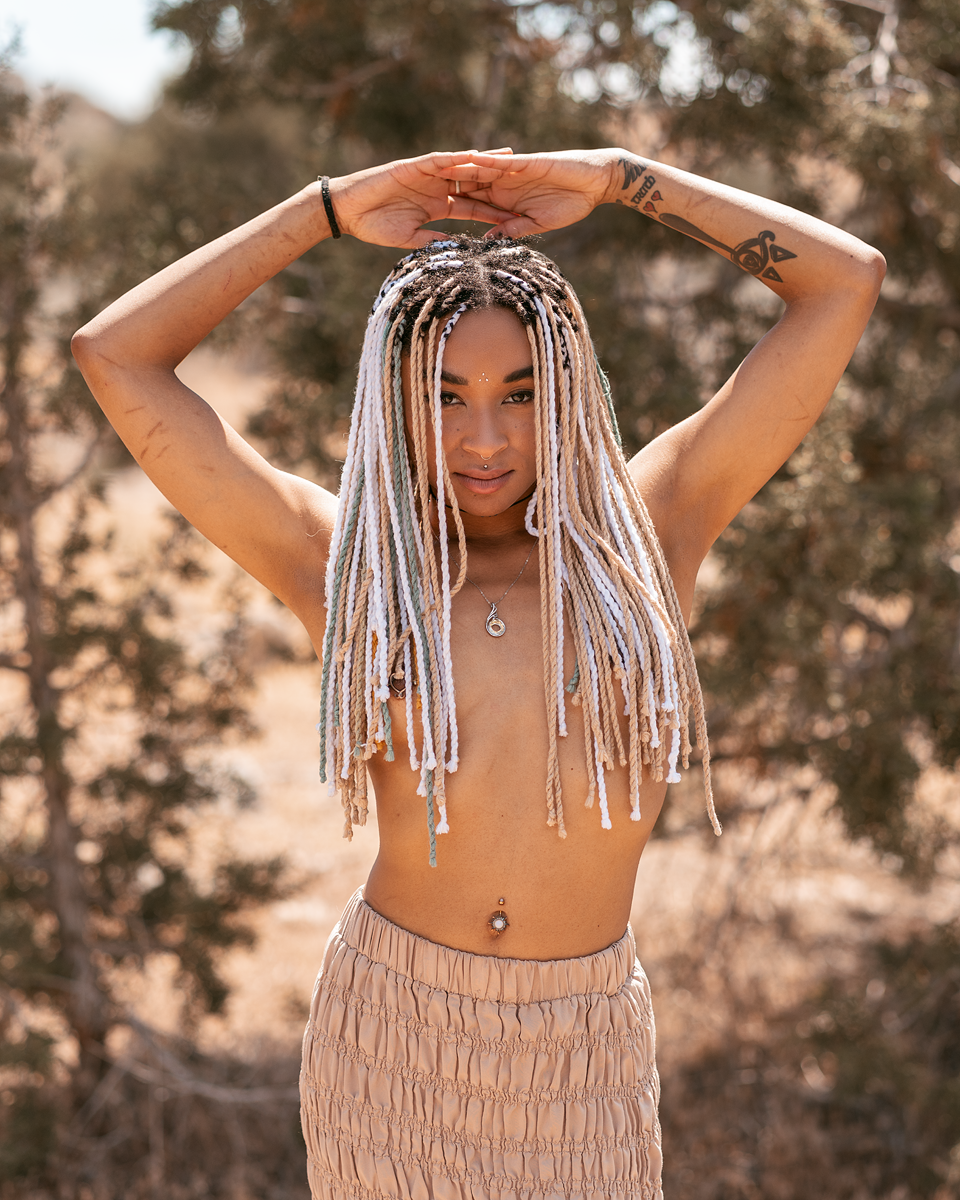
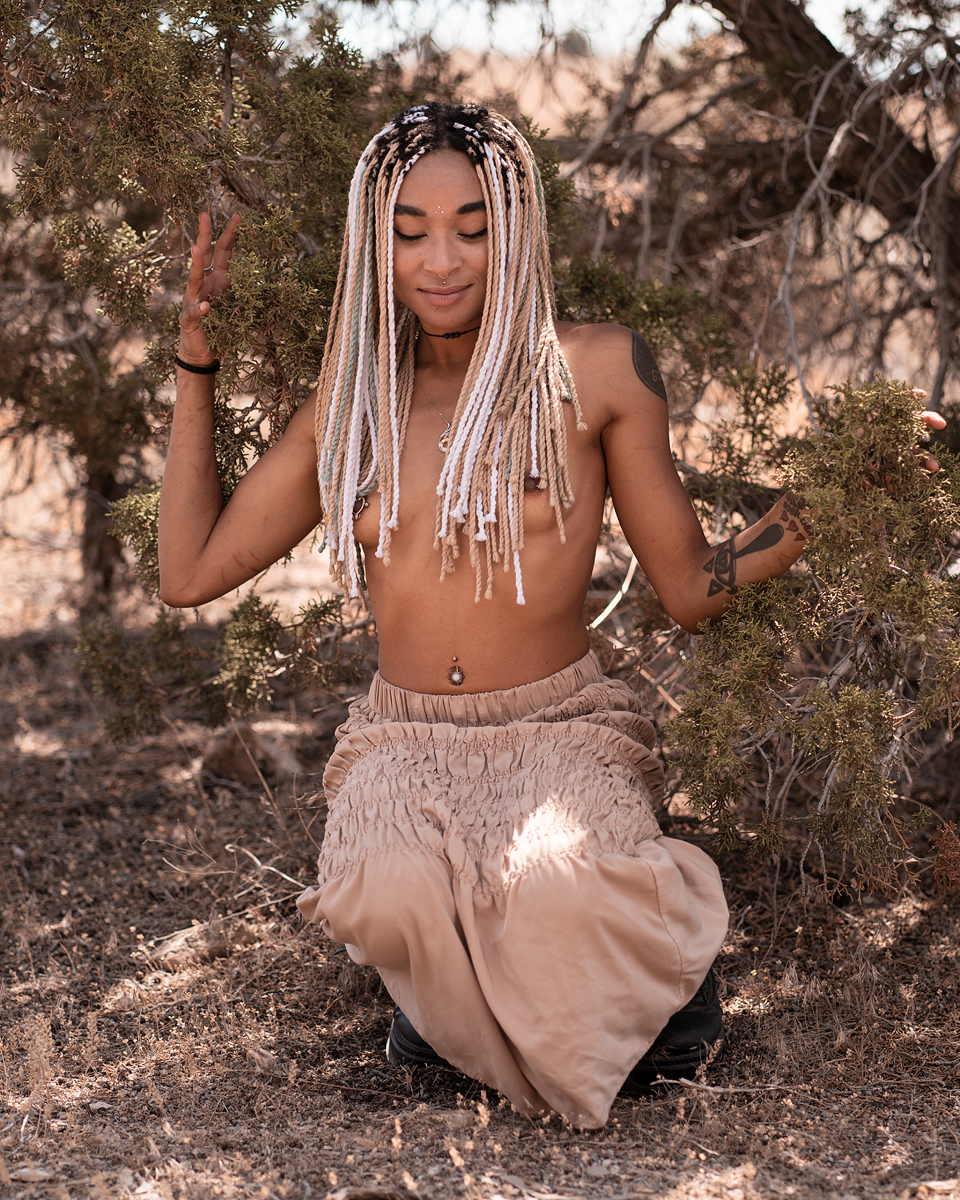
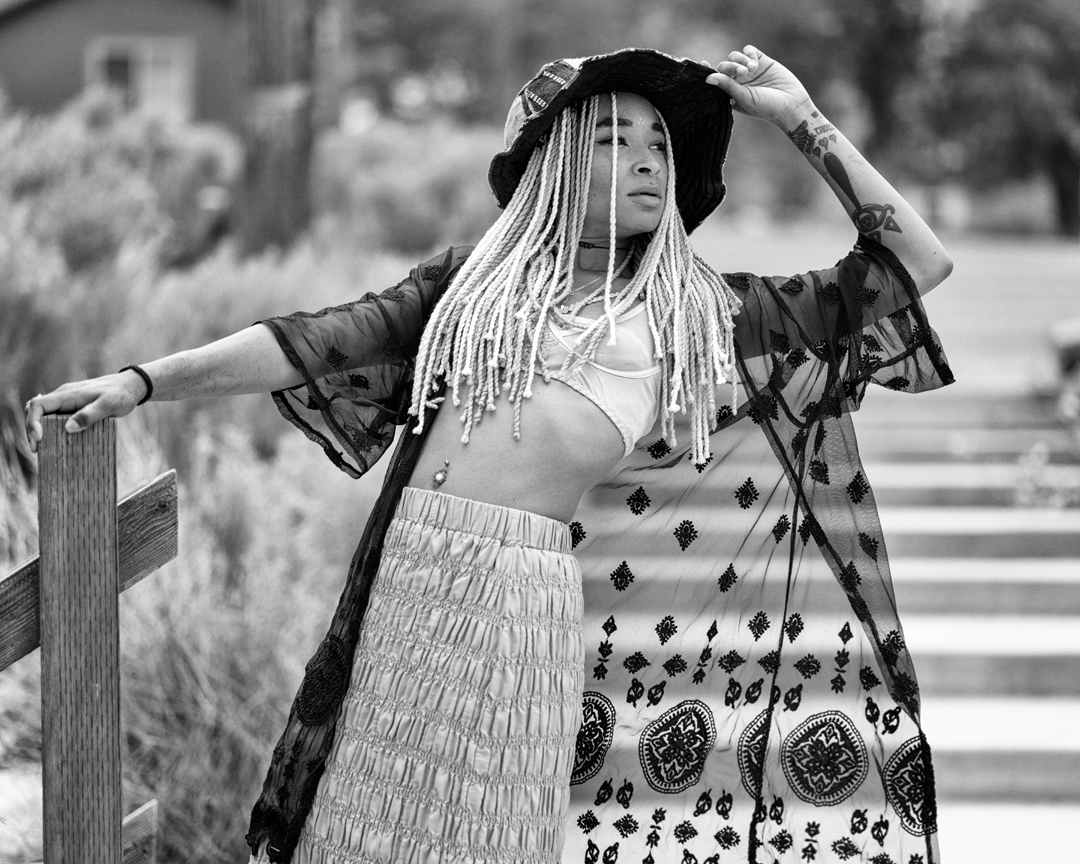
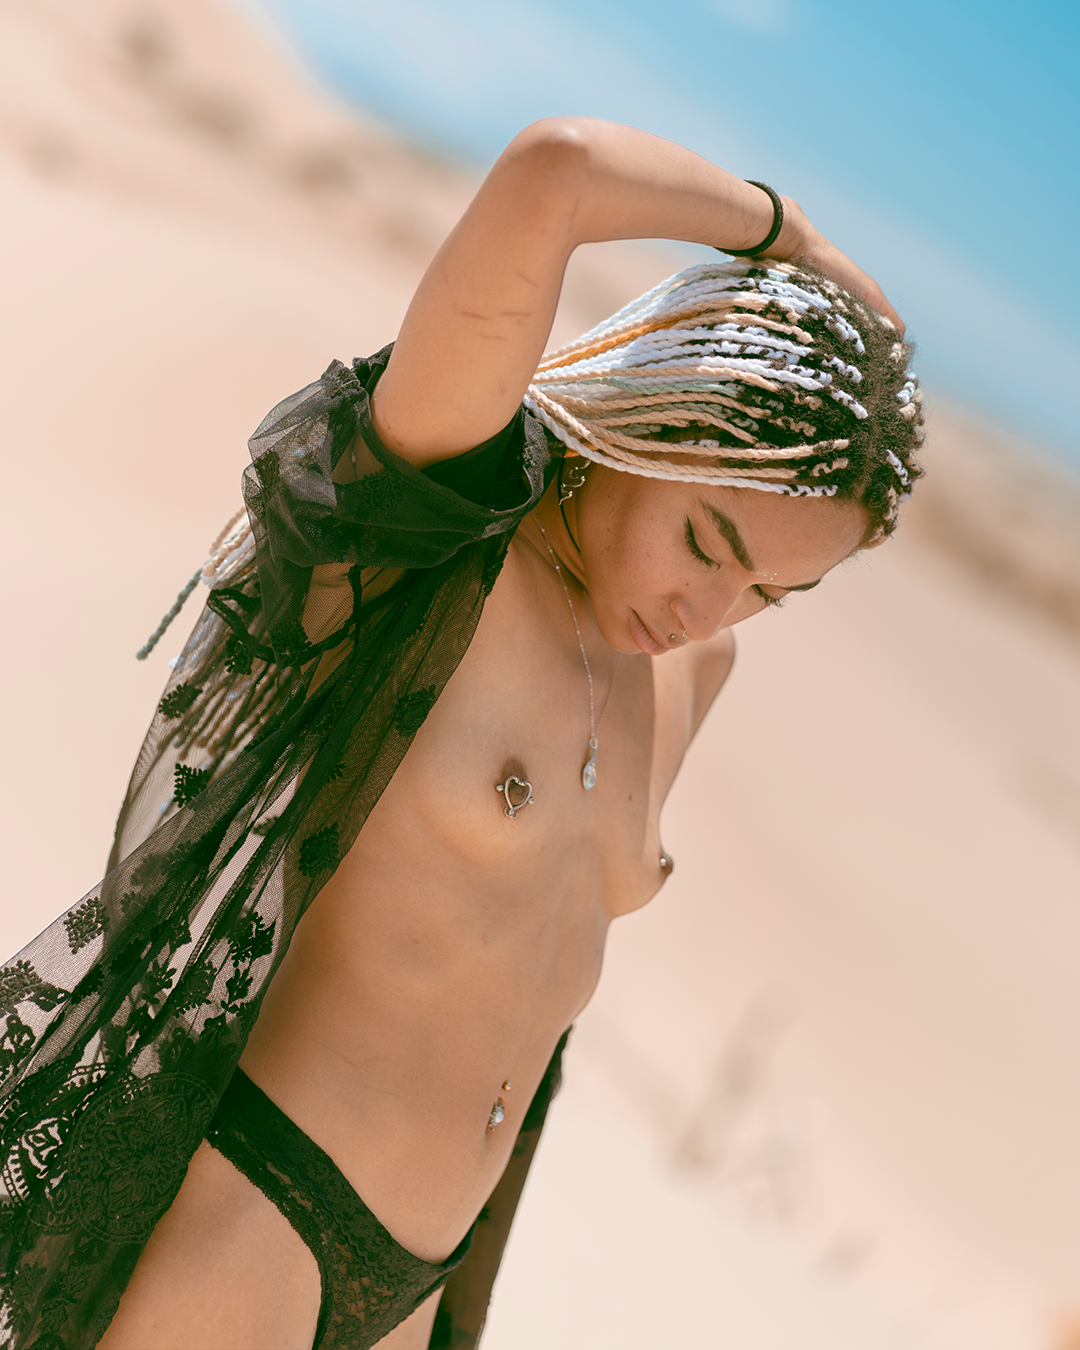
Shamir brought a bunch of different clothes, but I wanted to keep it in the realm of Shamir’s free spirit style; in other words, you wear what you want. A lot of what she decided to wear was a kind of amalgam of BoHo and goth? Not really sure, but I think it worked. She brought it all out and threw it on the hood of the truck and we just randomly grabbed some clothes and she put them on.
Amidst the junipers, bunchgrass, and high desert air everything seemed to fall into place. No method, just a little madness.
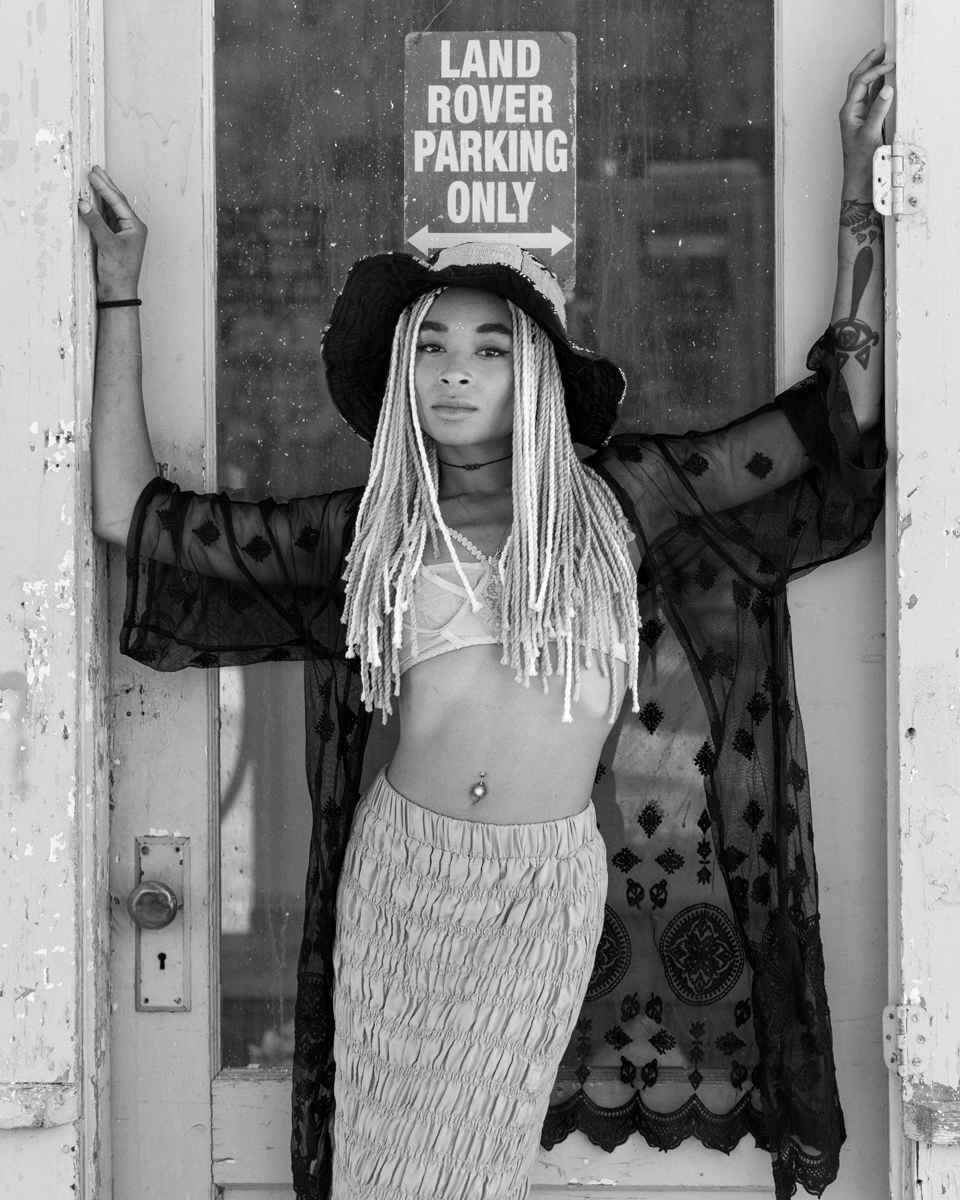
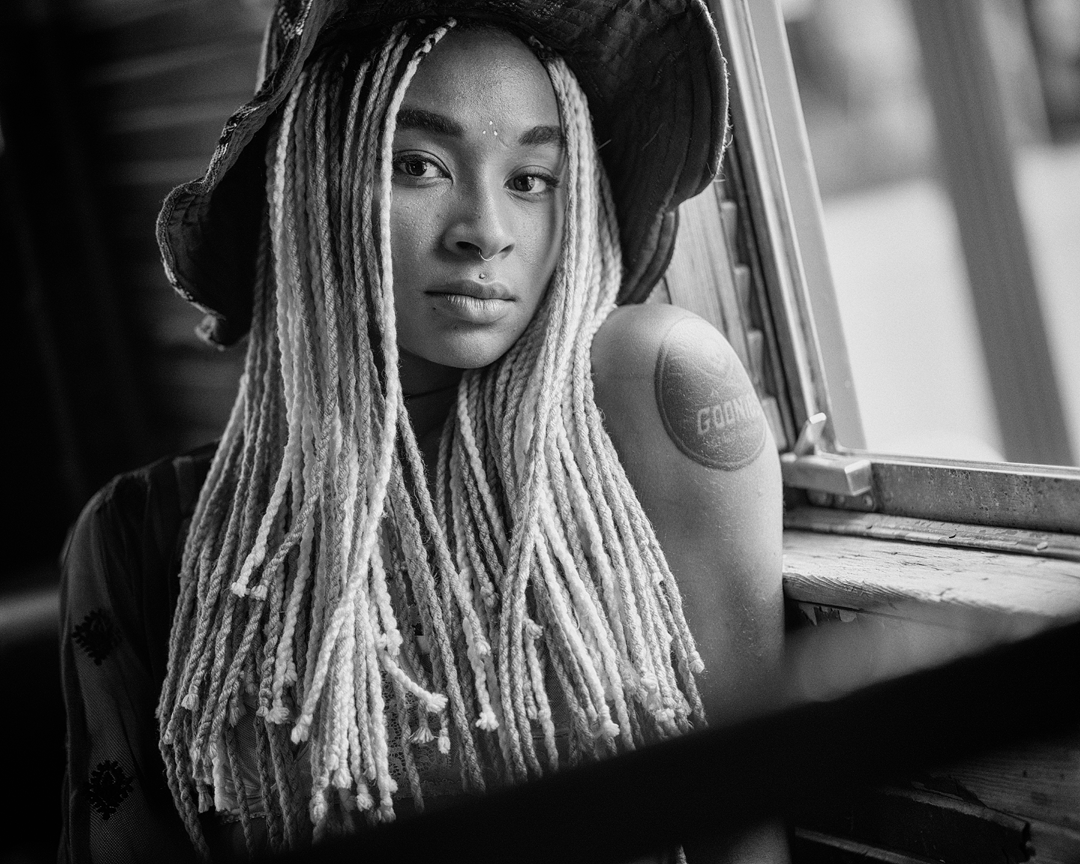
This old abandoned gas station is one of my favorite locations; especially at midday sun like it was here.
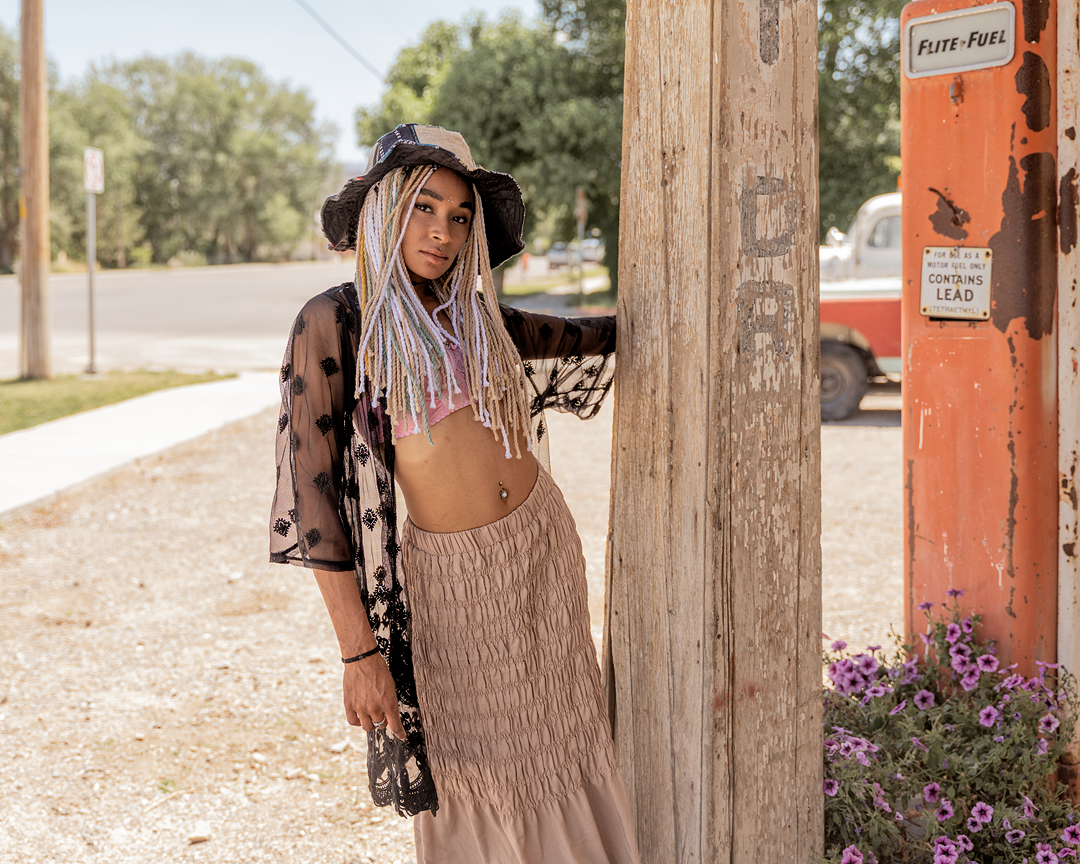
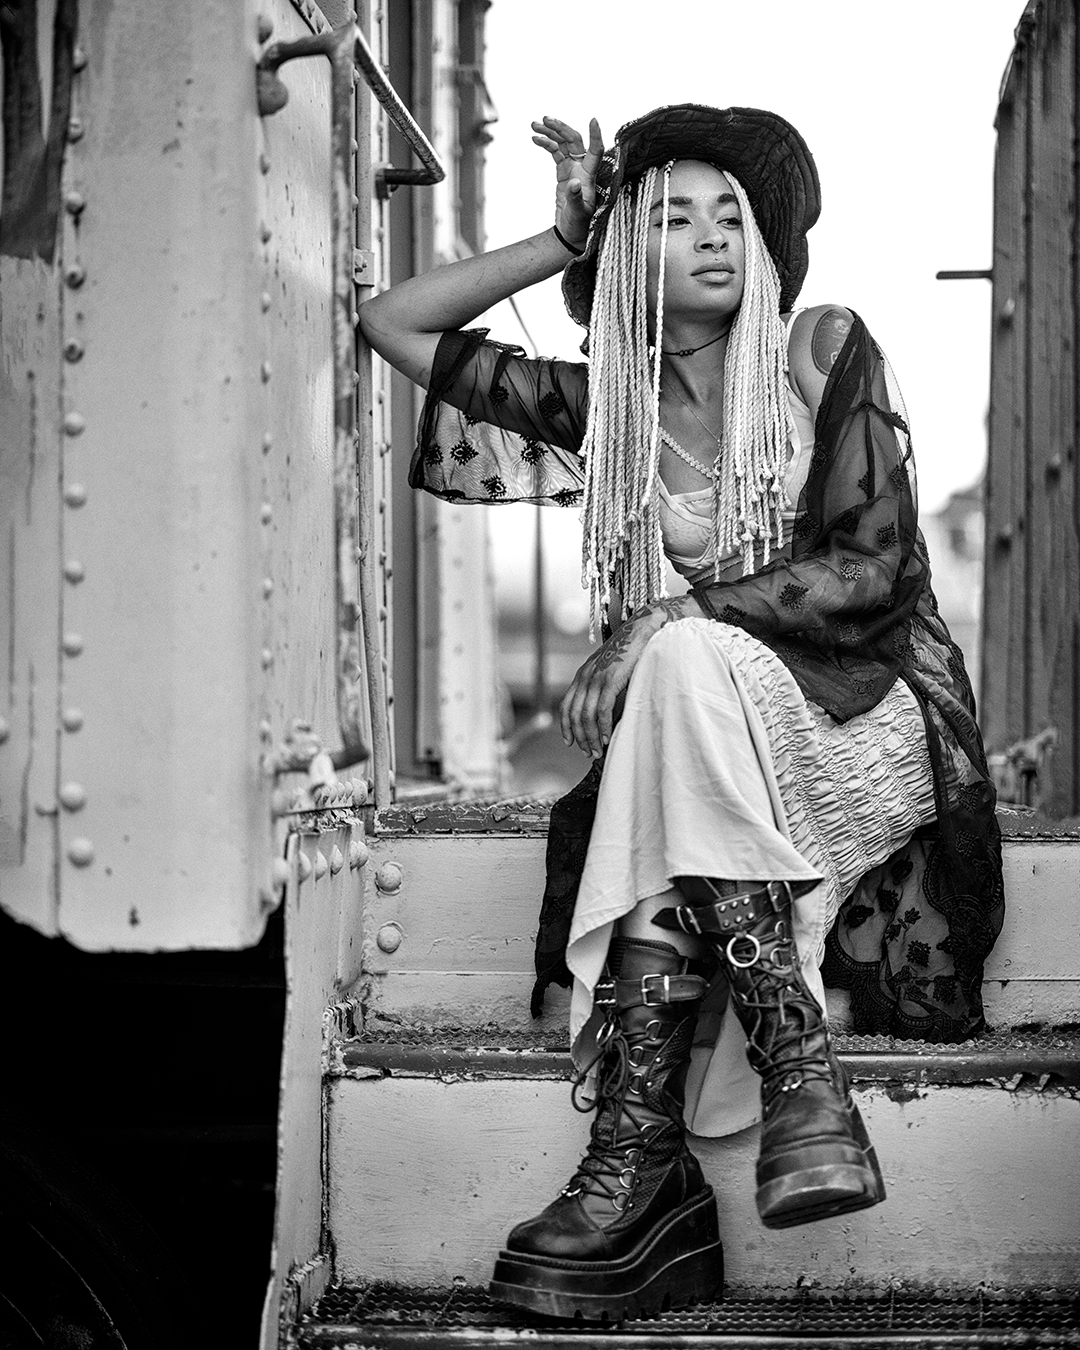
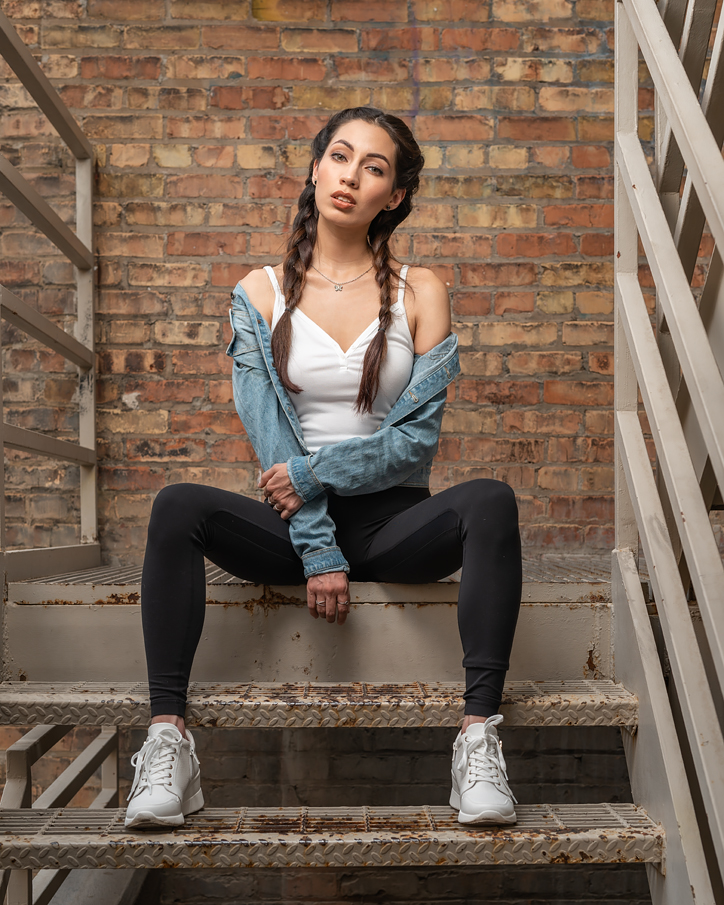
From the old gas station we continued up the road further into the desert. Out in this remote area there are many little nooks and crannies to simply pull over and make something happen. Like this little row of stairs between two old buildings.
The West Desert has a long mining history going back over one hundred years. There are a lot of broken down buildings and trains. It’s not unusual to see an old passenger boxcar sitting off of the road in tiny out of the way towns.
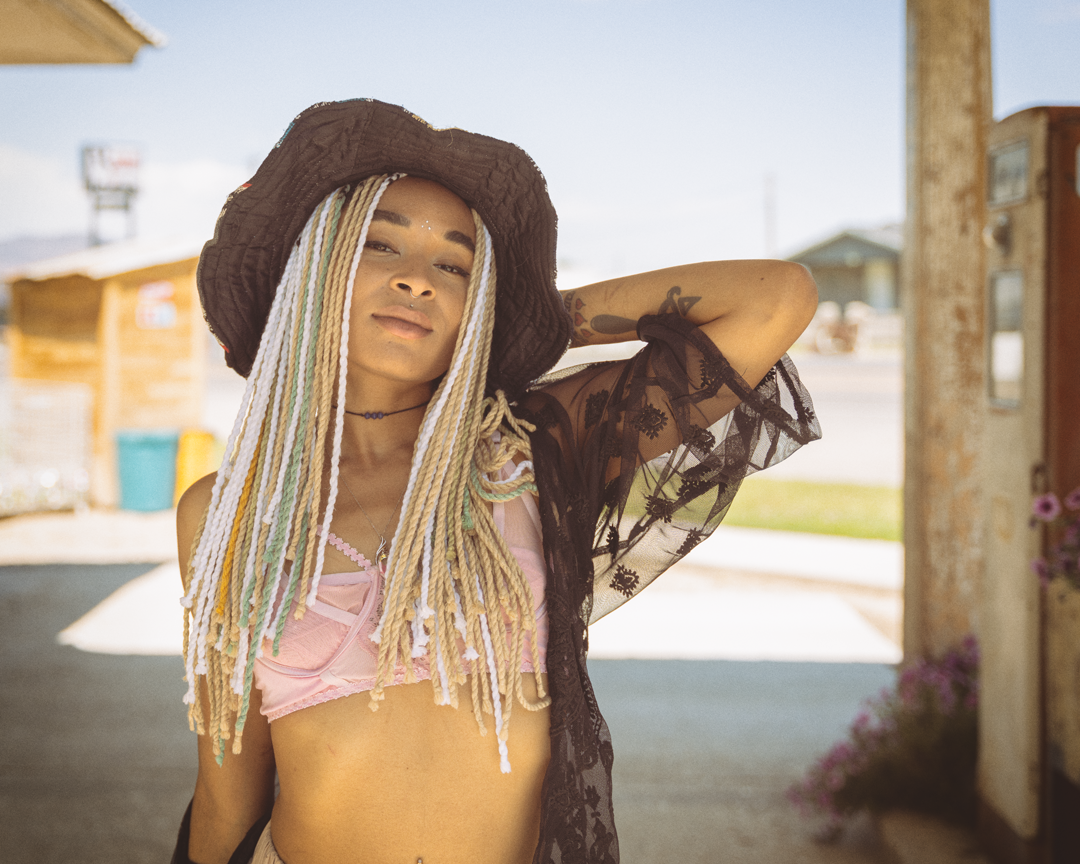
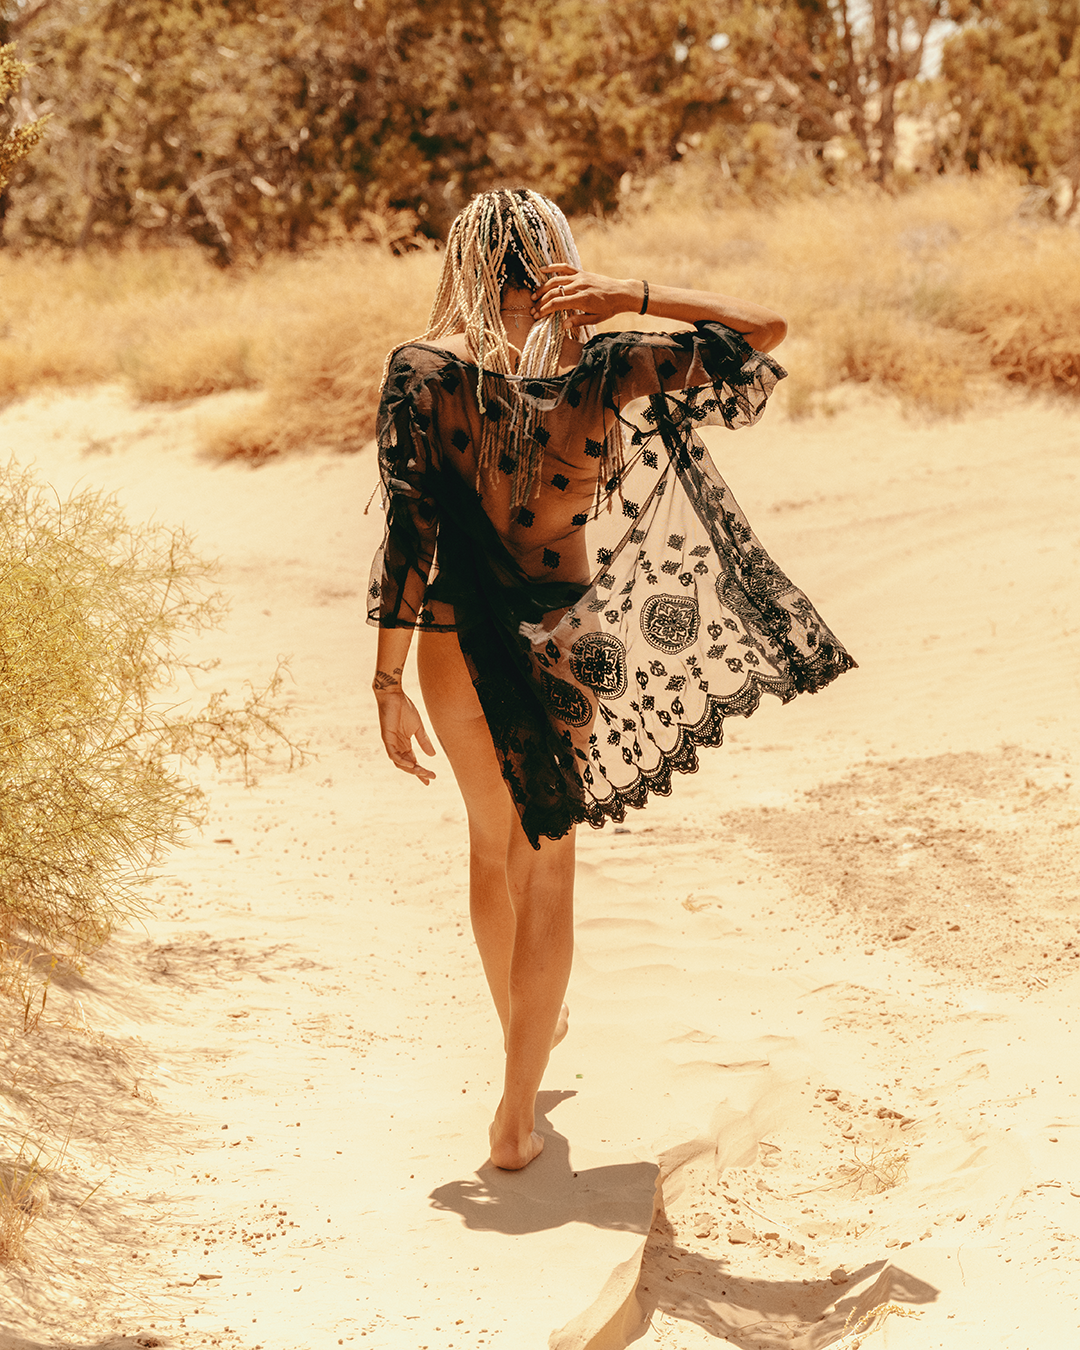
Once again we jumped in the truck and headed further west deep into desert country. On the drive Shamir intended to do a change, but couldn’t really find anything that she was feeling. The only thing that I really had a strong feeling about was the black cover that she had been wearing thus far.
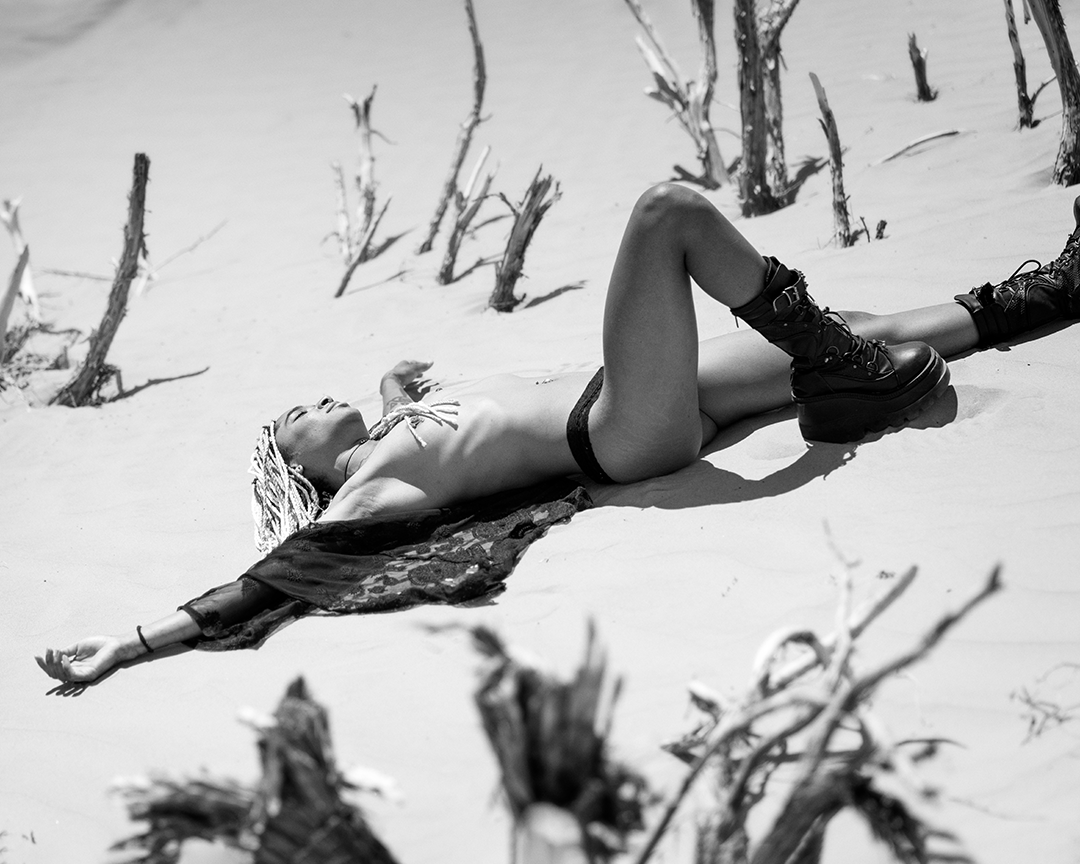
Once we got to the location, however, she looked at the sand dunes and felt she had an inspiration of exactly what she wanted to do. We sat in the truck for a few minutes and drank a lot of water, and then set out into the barren landscape.
It was time to head back to civilization so we walked back to the truck, pointed it east and drove.
Model: Shamir
Equipment used: Sony Alpha 7R IV, Sony 135mm F1.8 GM, Sony 85mm F1.8, Sigma 24-70mm F2.8 DG
As a photographer of people it can be difficult to develop your own style. It’s one of the questions I see often on the various groups or forums that I visit. It’s something that I’ve thought a lot about and I’ve actually come up with a way that works for me and I’ve implemented it. Keep in mind that it’s simply just my opinion. Though I’m primarily a people photographer I don’t see why it wouldn’t work in some other genres. Though it’s something that I think has worked for me, your mileage may vary. Also keep in mind that I’m coming from the perspective of an artistic people photographer. Sure, if your gig is pumping out hundreds of corporate headshots there are certainly conventions you’re going to need to adhere to. But that’s different. If someone is striving for their “own style” photographing people, they’re not hanging out a corporate headshot shingle.
Don’t listen to aesthetic opinions of other photographers
I know that it’s anathema to not reach out for criticism or “help” from other photographers, but I really think it’s the worst thing to do when it comes to aesthetic. One of the things that new photographers are told that they need to do to “get better” is to seek the aesthetic advice of other photographers. It’s an example of conventional wisdom that is just wrong. Don’t put up a photo in a public space and ask for criticisms or advice. Also, unfortunately, the world of photography is full of people who are more than happy to take it upon themselves to give you their unsolicited aesthetic opinions; something that has always baffled me.
Aesthetic–indeed art–is entirely subjective. Yes, I know there are those who have wasted a lot of money on an art degree of one kind or another who will argue with that, but it’s the truth. What may be visually appealing to one person can be trash to another.
I’m not saying that you shouldn’t reach out to other photographers for technical advice. New photographers should definitely do that. For example instead of just posting a photo and asking for blanket advice, you’re far better off, say, posting it and stating what your goal was; lighting, editing, etc. and asking for advice on where it was missed and how to achieve it. But in order to do that you need to first know what your goal is.
How you edit does not determine photographic style
This is a common trap that many new photographers fall into. They try to achieve a personal style through editing. Some will spend money on Lightroom presets with that goal in mind and there are a lot of people out there that are willing to oblige them. One’s personal style is mostly created with how they take a photo. How they edit it has little if any bearing on the style. It’s why you can look at a Peter Lindbergh photo that is black and white and look at another that is color and you can tell that both are a Peter Lindbergh photo. Sure, a photographer may have an editing style that they have a propensity to use, but that is not what identifies their style.
Some photographers who are well known for their style don’t even edit their own photos. They hire it out. The editing styles of their photos may have changed over the years, but their style is still evident.
Don’t get hung up on rules
As an artistic people photographer there are no rules. This kind of goes back to the don’t listen to other photographers point I mentioned above. Some of the most annoying rules to me are the compositional rules or the cropping rules. Nothing gets ravaged more in a public forum than a photo that is cropped in the middle of an arm or leg, or at the top of the head. People hung up on these things are just silly.
Some of the most iconic artistic people photos violate all kinds of rules and would be savaged on your typical photographer’s forum. Some of the most amazing fashion photos have crops that would make a rules centric photographer loose their minds.
Again, don’t worry about rules. At all. Focus on making photos that YOU love and ignore the opinions of other photographers.
Step by step
OK, I’ve bloviated on my opinion on various things, but how exactly do you go about working on developing your own personal photographic style?
Here is my approach:
Create a folder on your computer and name it whatever you want. This folder is going to be with you forever. As you peruse the internet in your everyday life, anytime you come across a photo that you love, simply save it to that folder. Don’t think about it too much. If you dig the photo, save it. It doesn’t matter where you find it; Facebook, Twitter, Instagram, fashion website, news website, forum, etc. It doesn’t matter where you come across the photos. If you really like it, just save it to that folder. But it’s important that you only save the photos that you really like; that really hit a nerve.
After some time–days, weeks, months–you will accumulate a lot of photos in the folder. When you open the folder you will see many photos that you’ve accumulated that you love. There will likely be a variety of different photos consisting of different types of people and editing, styles. It doesn’t matter. Though you may not be able to identify it at first, there will be a common thread throughout all of the photos. It may take some time to actually identify it. But trust me, there is a common thread. There has to be because all of the photos in the folder are there as a result of your personal aesthetic. There is only one you on a planet of 8 billion people. If all 8 billion people created their own folder of their favorite images there would be 8 billion distinctly different folders.
You will need to spend a fair amount of time in the folder looking at the images that you love. Eventually you’re going to realize the common thread. You may not be able to verbalize it, but you’ll know it when you see it. And when you create your own photos you’ll think of it. Make the photos that YOU love for your own reasons.
In time take some of your favorite photos that you’ve made and stick them in the folder. How do they hold up? It’s likely that initially, they won’t hold up in comparison to the other photos. If they don’t, then remove them. But it’s good to see how they stand up amidst all of the other photos that you love.
Eventually you will make some photos that absolutely hold their own according to your aesthetic. Even though they may look wildly different than many if not most of the photos in the folder, they will still ride on that common thread that runs through all of them. That thread is YOUR style.
I started this approach a few years ago and my folder contains many hundreds of images and I’m still adding to it.
Some time ago, during the waning days of summer, Inna and I spent a day wandering the mountains and taking photos. I had pretty much everything with me, including an off camera lighting setup, but was really hoping to not have to use it.
Fortunately I had a good friend and an assistant who was able to come along and hold reflectors and scrims which helped immensely in this goal. Also the fact that it was raining off and on pretty much made it impossible to use the lights anyway. This is the mountain west of the United States; Utah to be exact. The old adage of “if you don’t like the weather, wait 5 minutes” was very much in play.
For most of the day it was a mix of rainy, cloudy, cold, bright and sunny, and warm.
Whatever Mother Nature threw at us, we just made it work.
We started the day off by meeting at the studio at noon where Inna and I jumped into the truck while Brant–good friend and assistant–followed us to a local coffee shop. A day’s driving is always best when started off with coffee. I love the light in this place and I often times start off these lifestyle/editorial day long excursions here.
ISO 160, Sigma 24-70 2.8 Art, f2.8, 1/250
After taking a few photos at the coffee shop–onlookers taking it all in–we finally headed up to the mountains through rainy and dreary weather.
By the time we got to the location which is about a 40 minute drive, it started coming down real hard. Hard enough in fact that we ended up just staying in the truck for about a half hour until it stopped enough for us to not get entirely soaked.
ISO 100, 85mm, f1.8, 1/5000
Once the weather cleared it turned beautiful quickly with fairly heavy cloud cover and some great intermittent light.
ISO 100, 85mm, f1.8, 1/2000
One of the challenges in quickly moving cloud cover is that the light is constantly changing. But patience pays. Take your time and the light will come. Just be ready to take the shot when it does.
ISO 100, 85mm, f2.2, 1/1250ISO 100, 85mm, f2.2, 1/2500
As Inna wandered across the bridge, we decided to wrap up this leg of the journey and head to another location. Besides, it was getting a little crowded.
ISO 100, 85mm, f1.8, 1/8000
By the time the above shot was taken, the midday sun was coming out full force. A lot of photographers hate midday sun. Not me. I love it.
We loaded up and drove further up into the mountains. By this time the sun was pretty much directly overhead and I opted to use both a scrim and a reflector to help control it. Inna did a quick change, and we grabbed a bag full of clothes and headed out into an amazing meadow.
ISO 100, 85mm, f2.0, 1/640
In case you can’t tell, I love shooting with an 85mm lens.
ISO 100, 135mm, f1.8, 1/4000
But nothing beats a 135mm lens for a shot like the one above. I love the wild child vibe that Inna has going here.
ISO 100, 135mm, 1.8, 1/4000ISO 100, 135mm, f1.8, 1/2500
Time for another change-up.
ISO 100, 135mm, f1.8, 1/3200ISO 100, 85mm, f2.5, 1/640
This is an example of having a good collaborative team on shoots. We were getting ready to call it a day and head back to the truck, but really wanted to get one more look in. We were all a little tired by now. Brant, my assistant, came up with an idea, “Why not have her throw her jacket at the camera?
Sounds awesome to me. Let’s do it. I’m always willing to listen to any ideas that someone on the team has.
The photo below is about as carefree as it gets.
ISO 100, 85mm, f2.5, 1/400
This (below) was the last shot I took of the day. Let’s go celebrate!
35 and Up! is an ongoing project of mine that I’ve been working on for a couple of years now. The 35 and Up! project features photographs of women who are 35 years of age and older. There are lots of reason why I love doing this project, but there are a couple main ones.
First: There is something about women at around 35 years old and older that sets them apart from most who are younger. It’s very difficult for me to quantify, but I can see it. There’s typically a confidence that comes with complete comfort in your skin because you’re at the age that it really is what it is. Typically, by about 35, in my experience, people are generally past the times when they’re trying to be something they’re not.
Not always, but usually.
And this is not to say that young women–or men for that matter–don’t have the capability for a certain je ne sais quoi, they absolutely do, but it’s usually something different.
Second: Casting calls for models 18-26 are a dime a dozen. Everybody and their uncle wants a model or models in the 18-26 age range. I don’t think models 35 and older get their just due. That’s my opinion.
Anyway, the following 35 and Up! participants appear in no particular order. I won’t disclose how old they are except that they are all over 35 and the are all stunning. Like I said, I love this project.
Tanya
Tanya isn’t a “model.” She’s just a dear friend who I love taking photos of.
TanyaTanyaTanya
Chelle
I met Chelle a couple of years ago and we’ve done a few shoots together. And, of course, she rocks the 35 and Up!
ChelleChelleChelle
Kirsty
I put the word out that I was looking for some models for the project and Kirsty stepped up.
KirstyKirstyKirsty
Eliana
Eliana made it to the studio and blessed me with some amazing shots.
ElianaElianaEliana
Emily
Emily came in to the studio on extremely short notice. I think I had a shoot reschedule and I posted on Facebook that I was looking for someone to come to mess around with lighting.
This lifestyle editorial features the amazing Vittoria Hiltbrunn. The theme of the whole shoot was “road trip to the desert.” We spent the better part of a day and a couple hundred miles driving from the city making our way through much of Utah’s West Desert and finally ended up at the Little Sahara Sand Dunes.
I want to mention that it’s simply not possible to do a shoot like this and not be able to take photos in any lighting condition. You To hell with “golden hour!” I’ve always found it puzzling that people relegate themselves to be a slave to an hour or so at either end of the day to make photos. Don’t do that. Learn how to use flash, scrims, making some place work no matter what time of day, whatever. In other words, be able to take photos in whatever conditions you find yourself in.
We started the adventure at noon in the lobby of my studio because I love the mid-day light there. Plus it’s a great way to break the ice so to speak.
ISO100, 85mm, f2.8, 1/250
A quick change and another lobby shot. This one using the awesome Sigma 24-70 Art 2.8 lens.
ISO100, 35mm, f3.2, 1/160
After a few shots in the lobby of the studio we drove to a coffee shop before hitting the road. The coffee shop has some huge west facing windows that throw some amazing light into the common area.
After our coffee, we hit the road in earnest traveling south for several miles then cut off of the freeway heading into Utah’s West Desert. Our first stop was the tiny town of Goshen, Utah. The only reason you even notice this little place is because the posted speed limit slows a bit.
The following photos taken with a Sigma 50mm 1.4 Art.
ISO100, 50mm, f3.5, 1/640ISO100, 50mm, f2, 1/2000
The whole vibe of this extinct roadside gas station was pretty amazing.
ISO100, 50mm, f3.5, 1/400
Continuing further west, we hit a little wide spot in the road called Elberta.
A friend of mine looked at the photo below and commented, “I can almost hear the wind blowing, the door hinges squeaking as the doors bang in the background.”
Yes, so can I.
On this shot I did use a tiny bit of fill flash from camera right. The lighting conditions were all over the place with clouds coming and going.
Also, I’m using the Sony 85mm 1.8, one of the best sub $600 lenses there is. It’s absolutely a beast of a lens for any price point.
ISO100, 85mm, f3.2, 1/1000
If you find an old broken down motorcycle, of course you integrate it into a photo.
Again, a tiny bit of fill flash from camera right.
ISO100, 85mm, f3.2, 1/1000
After we finished up in this cool little location, we packed it up and continued west, eventually arriving at the mining town of Eureka. I kid you not. A mining town called Eureka.
Vittoria changed it up and we found this great little stairway alley. It’s amazing the cool locations you can find just about any place.
ISO100, 85mm, f3.2, 1/800
Looking around, what did we find? An awesome door frame.
Pro tip: If you ever decide to shoot out at Little Sahara, do it on a Sunday. Any other day of the week it’s jammed with ATVs, motorcycles, and campers. On Sunday it’s generally nearly empty.
Vittoria changed her clothes, and Angela who was pulling assistant duties this day brushed sand from her bum. Of course I caught the moment. To be honest, without Angela, the whole day would have been much more difficult.
Angela the assistant.
Vittoria changed into a dress and we took off across the sand dunes. There’s no way around it, she just rocks these shots.
Using flash to make natural light photos might seem counterintuitive to some, and it might drive some natural light photographers a little nuts, but hear me out.
There’s obviously nothing wrong with embracing natural light and natural light only for portrait photos. If the light is there and you can get the look you want from it, go for it. But often times the natural light just can’t quite cut it on its own; at least for some of the looks I want. The looks I’m talking about aren’t necessarily those in which a flash is obviously used; that flash look. I like that look sometimes. It’s a pretty common look nowadays.
Here’s an example:
To me it’s obvious that a flash was used on this shot. The biggest tell is the fact that it’s shot against a bright background that isn’t completely blown out. In fact it’s shot directly into the sun. That’s the little blown out area you see. But the model, Cindy, is properly exposed. Combined that with the catchlight in the eyes and and the shadows from her legs, yes, this used flash. In fact the use of flash is as subtle as a sledge hammer on the head. That’s ok, though, because it’s exactly the look I wanted.
For this shot I used a 60 inch octa just slightly off axis, camera right.
Remember, light is light. It doesn’t matter where it comes from. Whether it comes from the sun, a lamp, a speedlight, or a strobe, photons are photons. There’s an old joke about using available light, and then pulling out a flash you have with you because it’s available. Yes, cheeky, I know, but it there’s a lot of truth to it.
For many outdoor shots, I tend to use flash even though when I do it’s not obvious. In fact I like to use flash wen when my goal is to create something that is going to look natural.
Can you tell if this shot is using flash or not?
I would venture to say that many, if not most, would say this was shot without flash. There are no telltale indications that a flash was used. It looks as if there would have been no need for flash. But when viewed at full resolution, you are able to see a subtle catchlight in the eyes that look like it could be from a soft box of some sort.
But, yes, this shot is done with a flash. I had an assistant hold a speedlight in a 28 inch octa about 45 degrees to the model’s right and about 45 degrees up from eye level. This spot is a little recessed nook off of an alley. Camera left is the alley. Across the alley is a concrete building which provided a huge bit of bounced light coming over the rooftops camera right. But during this shot, the rooftops were blocking direct sunlight. So, we made our own with just a tiny bit of fill.
Yes, I could have bumped up my ISO or slowed down my shutter speed, or opened up my aperture (or all three). But for this shot, I wanted to shoot at f4.5 to make sure that all of Cindy was in focus and just a little fall off on the wall behind her. Also, I wanted to keep my 50mm lense at no more than 1/200. The reason for that is because we were running and gunning around downtown, trying to beat the light. I was huffing a little bit and not entirely steady.
So why worry about it? I just decided to use my available speedlight.
What about this shot?
Natural light or flash?
This shot is a mix of both natural and flash. The sun, almost directly behind the camera, had settled behind buildings thus direct light on Cindy was blocked. I wanted to get the city in the background in a good exposure, but doing so left Cindy darker than I wanted. So I used a 60 inch octa just camera left and just a tiny bit of flash to fill in a bit. It really allowed me to balance Cindy with the background exactly how I intended.
In all of the examples I’ve shown I could have easily gotten photos of Cindy. There’s no doubt about that. But I would not have been able to get the shots I wanted. I would argue that, first shot excepted, I could have gotten what I wanted with a reflector instead of a flash. But, for me, flash is a lot easier because it’s more predictable. I also typically use an assistant on these kinds of shoots which really makes it easy.
Without light, photography doesn’t exist. If you’re a photographer you have to learn to see the light. If you’re not seeing the light, then you’re severely handicapping yourself.
Notice I didn’t say find the light. That goes without saying. But learning how to recognize it, you don’t have to find it. It comes to you. I can’t tell you many times I’ve gone into a session with a specific goal in mind and stumbling upon some light that just caught my eye and I couldn’t simply move on; I needed to take advantage of it.
That’s called seeing the light.
Earlier this summer I was doing an uptown shoot with an amazing model, Cindy. I had an assistant along with us to help with holding a flash. I like having flash because it means that I can find a location and, if need be, mold the light to what I need it to be. We wandered a few square blocks downtown taking shots at various locations. All of this was with the intention of wrapping up the session with a rooftop golden hour location. The intention being to use a strobe to balance the light.
We did do that rooftop location exactly as I intended and envisioned it. But while driving through the garage to the rooftop, I stumbled on some amazing late afternoon light coming in at a low angle into the parking garage. The light was broken up by low walls and huge cement beams which created some amazing shadows. Right away, the whole thing hit me like a sledgehammer.
This is a time and place to get some shots.
Cindy and I parked, jumped out of the truck, and spent about 2 minutes snapping some shots. This is the kind of situation that a good model really pays off. Light like this is fleeting and you don’t want to be racing against rapidly changing light to get the shot.
This is the shot we got:
Model: Cindy, ISO: 125, 85mm, f1.8, 1/800
I love the strong shadows, leading lines, and strong light on her face.
We got a lot of great shots during the session, but this is one of my favorites. It’s one of my favorites because of the light that I simply stumbled across.
Over the past few years of doing the photography thing I’ve really gravitated towards doing a lot of work with models because I’ve found that I love photographing people. From my admittedly limited experience I’ve come up with some tips for both models and photographers that I believe to be useful for me. The key thing here is that this is purely from my personal perspective, and it’s geared toward collaborative shoots for portfolio or personal project endeavors.
Please keep in mind that following is my opinion and how I do things. If it’s not for you, rock on.
MODELS
Don’t practice posing in front of a mirror
Really, don’t do that. It gives you a wildly inaccurate representation because what you’re seeing in the mirror is, well, a mirror image of you. It will never look like what you see in an image of yourself. If you feel you must practice in front of a mirror, instead practice emoting. Sounds weird, but posing is easy. Emoting is hard.
Pose less, move more
Some of the best, most experienced models earn their bread and butter by posing, holding it, camera clicks, they then switch up the pose, hold it, wait for the camera to click … And, frankly, many if not most photographers perpetuate this. It’s not necessarily a bad thing; in fact in many circumstances the pose hold approach may be preferable; lookbooks, catalogs, headshots, etc. Also, I’ve done shoots in which precise and complex lighting was necessary. In those circumstance, yes, pose hold click is great. If you want to get good shots easily, a good model doing the pose and hold approach is great.
With a good model, this approach will guarantee really nice photos if the photographer does their job. But then look at the awesome photos you got, then look at the photos from previous shoots with other photographers. Other than setting, lighting, and wardrobe, they’re likely to be pretty much the same.
And that’s not necessarily a bad thing.
But if you want to get photos that are different and stand out, drift, flow, and move and make the photographer work for the shots by capturing the moments. Instead of looking at it as posing for a photo, approach it as if moving for a film or video. Learn to drift with not only your body and limbs, but with your eyes, face, and emotions too. I’m not talking about flailing around wildly or even mildly. I’m talking subtle drifting with posture, emotion, and eyes. You can tell you’re on the right track when reviewing the images by quickly going through them. It will look like a stop motion film clip.
I’ve worked with some pretty experienced models with whom I’ve spent considerable time getting them to pose less and drift more. It’s uncomfortable for them at first, but once they take a look at the results on the computer the clouds part quickly.
Yes, you get a lot of weird, goofy looking shots, but you also get some amazing and unique shots that you likely would not get otherwise. And with practice, the keepers to duds ratio improves greatly.
Models are horrible at determining what is or is not a good photo
Trust me. It’s true. Models are the worst judges of photos. The reason, I feel, is that they focus on what they believe to be their personal physical disadvantages; things that the average person that looks at them simply doesn’t notice. I think a lot of this comes from models judging themselves based on what they see in the mirror (see above) or in selfies.
The best judge of a photo is, like it or not, the photographer. Sure, if you’re paying good money to a photographer then, yes, pick what you want, but remember, the photographer is way more likely to know which photos are the best.
Don’t pose with your face
What I mean by this is, well, don’t pose with your face. Don’t contort your face to express an emotion (with rare exception). It’s not uncommon for some to twist their face into an emotion. Instead of doing that, try to begin with the emotion, really embrace it, and let the eyes follow as a natural extension. If it begins in the mind, the eyes will follow, and then the face will do what it’s supposed to do. Good actors know this.
No means no
Ideally before committing to a session, both the photographer and the model will have viewed each other’s portfolios and discussed at least generally what each one is after. That being said, it’s not unusual for either one of them during a shoot to suggest something. It’s perfectly okay for that to happen. But if a photographer suggests or asks you to do something that you’re not comfortable with it’s perfectly okay to say, “No, I wouldn’t feel comfortable with that.” And once you’ve expressed that, there should be zero discussion of it after.
And it works both ways. I’ve had models want to do some shots that I particularly wasn’t entirely on board with.
No means no.
Bring someone with you
If you’re doing a shoot with a photographer you’ve never worked with before, absolutely feel free to bring someone with you. There’s no reason that a photographer should have a problem with it. If you want to bring someone with you even if you’ve worked with the photographer many times before, do it.
I’m not talking bringing an entourage with you. No, definitely don’t do that. But, if you like, bring a friend, boyfriend/girlfriend, husband/wife, whatever. If you wouldn’t feel comfortable otherwise and the photographer balks, tell them to pound sand.
Sorry, photographers, but I feel strongly about this.
PHOTOGRAPHERS
Don’t take artistic advice from other photographers
Other photographers are the worst people from which to receive artistic feedback from. Do yourself a favor and do not seek artistic advice from other photographers. Sure, other photographers are great to learn technical aspects from; settings, lenses, getting your head around the use of flash, etc. But throwing your photos out there and asking for the opinions of other photographers is a nightmare scenario.
The reason I say this is because of the plethora of online places such as the forums at places like DPReview. If you go to, say, their Portrait and People Photography forum you’ll witness some of the most absurd nonsense you’re likely to see; much of it unsolicited in response to photos that people put up. I think much of the nonsense is because of the nature of an online world and how it has magnified human nature. Human nature, whether we like it or not, is to hear someone spout something with authority and then accept it without thinking about it. Examples of this are: don’t crop off the tops of heads. Don’t crop off the tips of fingers or feet. Don’t crop at the joints of limbs. Any hint of perspective distortion is bad. Catchlights other than round ones are bad. 2 to 1 lighting ratios are optimal, too shallow DOF, on and on. In other words if you push the boundaries at all and go against the “portraiture orthodoxy” they’ll pound you down until you conform if you let them.
I’ve seen new people start throwing up photos on that forum, make adjustments per the orthodoxy, and a year later they’re throwing up technically nice photos that are exact replicas of your average yearbook photo or something that was made in one of those family photo shops you used to see at the shopping mall. If that’s what you want, good. But if you want something that has just a slightly unique flavor to it, good luck. You’re just the next vanilla flavor sitting next the other vanilla flavors.
Do observe the work of other photographers
Within reason. The world is full of some truly great photographers. But don’t view the work of other photographers with the intent to necessarily copy what they’re doing. Instead, try to figure out what it is about their work or a particular photo that you like. Why do you like it? What is it about it that got your attention? Use the work of others as an inspiration.
I find that as time passes, I do this less and less. But I always enjoy looking at the work of others. There are a lot of talented people out there.
Learn from other photographers
There are a lot of great photographers out there. There’s something to be learned from almost any photographer. I love watching others work, how they deal with lighting, or how they work with models, or how they post process; whatever it is. If I’m ever invited to come and participate in any way by another photographer, I try to take them up on it because I almost always learn something.
Your way isn’t the only way.
Start creating a mood/vibe board
Remember, I’m directing this mainly towards people photographers. Start building a mood/vibe board of images that present various moods/vibes that you admire. You can do this with either an online tool like Pinterest or DropBox, etc., or locally on your own hard drive.
Personally, I prefer to use an online tool. The reason for this is because if I’m setting up a shoot or working with someone in creating a project, I like to send them a link to my extensive mood/vibe board so that they can pick out shots that represent a mood/vibe that appeals to them. It’s not to copy something, but to use it as inspiration. It also helps you to better understand where the model is coming from. It can save so much time.
I’m constantly adding to mine. It’s a never ending process. It includes photos from various photographers, including me.
Learn to use artificial lighting
Even if you’re a “natural light” photographer. The reason is that light is light; whether it’s natural or artificial. If you learn artificial lighting, it will translate into better understanding and use of natural light.
Practice more with natural light
This is directed at photographers who mainly use artificial light for the same reasons. Getting better at natural light will make you a better artificial light photographer.
Shoot tethered whenever possible
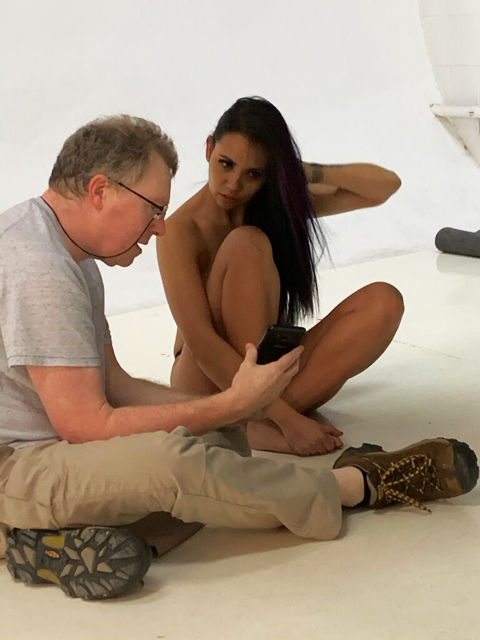
I know it may not be possible all of the time, especially when shooting on location or outdoors. But whenever possible, I highly encourage photographers to shoot tethered to a computer and encourage models to view what’s coming out. If you can’t shoot tethered, at least show them the back of the camera often.
Don’t be afraid to show unedited photos
This is related to shoot tethered whenever possible. I have personally spoken with photographers who will not let people see unedited photos. Because of this they will either not shoot tethered or, if they do, they won’t let people see the images on the computer. Don’t be that person. The reasoning for some is that they don’t want others to see images until they’re finished. They insist on only showing their “vision.”
Ugh.
If you can’t get it mostly there in camera, then you’re doing something wrong. Even if your “final vision” is a complex composite, show what’s happening to the model while taking photos. I know a photographer who specializes in complex composites. The guy is amazing. I’ve watched him work with models and he has no problem with showing them the back of the camera during the shoot. Even though what they’re seeing is not even close to what the final result will be, they still look great because he knows what he’s doing.
To take it a step further, after a shoot I encourage models to sit down with the laptop full of all of the unedited images we just shot and go through them and pick out ones they like the best.
If you’re not comfortable with showing people your unedited photos, work on your skills until you are.
Encourage models to bring someone with them
This is a big one for me. I always invite models to bring someone with them; especially if it’s a first shoot. Surprisingly, few do. But I always make sure that they know they are welcomed to. I know quite a few photographers who discourage it for various reasons.
I don’t get it.
For me, I want the models to be as comfortable as possible. If they’re comfortable, you’ll get better photos.
Plus it’s the respectful thing to do. Trust me, you’ll get better pics, too.
I’ve had husbands/boyfriends or friends at implied shoots that come along and I’ve never had a problem with it. In fact it can be kind of funny when they pull out their phone and take a behind the scenes photo of me working with their half naked wife or girlfriend.
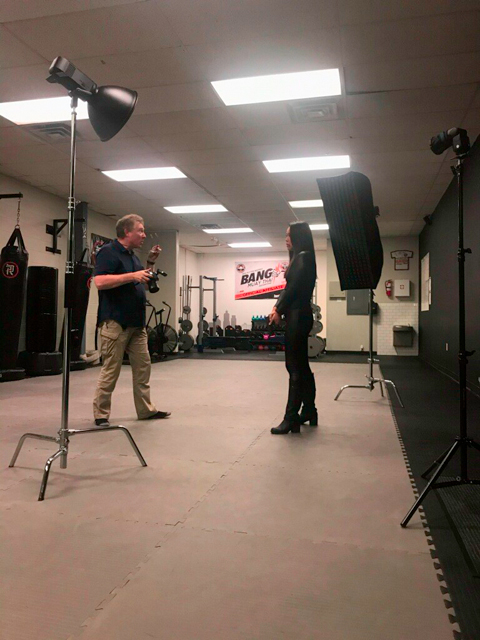
Behind the scenes with Analiza studio shoot.
I normally wouldn’t get as close as I am in the photo above, but we’re good friends and it’s still strictly business. When her boyfriend took the photo he chuckled and said something like, “Dude, it’s like you guys are in the office, or something.”
Here’s one of the final shots from the session:
Analiza studio session final result.
No matter what kind of shoot it is, it’s okay for them to have someone with them.
Behind the scenes with Angie photo shoot.
One of the final shots from the session above.
Angie studio final result
Be nice, be considerate
Modeling is difficult. Don’t forget that you’re dealing with a human. Get to know them. Talk with them. Make them feel comfortable. Understand that it’s a mutual collaboration. Make it worth their while to be doing this. Go above and beyond. Be accommodating.
This will mean talking while shooting. You can’t take on a truly mutually collaborative spirit without talking with the model and communicating with them while shooting. Always encourage. Never degrade. Make the shoot all about the model. I really mean that.
Also, the world is full of awesome people. This is a chance to meet and get to know some. I’ve never had a shoot after which I didn’t feel good about meeting and getting to know that person a little bit.
Don’t be creepy
I debated on whether to have this at the beginning or at the end because it’s so important.
I mean it.
Don’t be creepy. Don’t make crude or rude remarks. Don’t reference body parts in a sexual manner. Don’t leer, Don’t do anything that can be construed in any way other than strictly professional.
Some kinds of shoots really require good judgement and a lot of respect. Turn away if need be. Ask if they’re ready for you to turn around. Have a robe at hand and when not taking photos, offer it. If there’s a “slip” politely let them know.
The old adage of, “never touch the model” is a good one. If I’m doing an implied style of shoot, I try to keep my distance as much as possible. There are a couple of models that I’ve worked with numerous times and we’ve become good friends. We’ve developed good relationships. They are okay with me moving a couple of strands of hair, or something like that. But it’s the exception. And even then I always ask.
Reputation is everything. Don’t do ANYTHING to jeopardize it.
That can go for assistants, too.
In fact I’d love to be able to find a good female assistant. But that’s a whole other topic.
There you go. That’s it. Again, this is just my opinion and what has worked well for me.
A lot of people may think to convert color photos to black and white using Photoshop that it’s as simple as sucking away all of the saturation. But it’s not that simple. At least not for me and what I like. You may like something else, but for me, an effective black and white conversion needs to be stylized to some degree. After all, by simply going the black and white route we’ve comfortably eschewed the realistic.
With few exceptions we all see the world in color.
This photo originally began with the intention of it being color. That’s what I had in mind when I first set out to make it. Here is the original version after post processing:
Original color processed image.
I like it. It is what I originally had in mind; a sort of festival style fashion thing out in some rolling sand dunes. I like the colors and I love the skin tones of Analiza, the model, and how they tie in to the surrounding environment.
Then I thought about how it would look in black and white. The more I thought about it, the more I felt it could look great. But I knew it couldn’t just be a matter of simply converting the image to grayscale or dropping the saturation all the way to zero which results in an image like this:
Example of image completely desaturated.
To be honest, it’s not bad, but I don’t think it really pops. By that I mean there’s nothing really different about it other than it’s simply been desaturated to black and white.
Keep in mind that I’m not claiming this is the best way to convert images to black and white. There are a ton of ways of doing it and there are third party plug-in, too. This is just my way.
To convert the color image to black and white like I wanted, the first thing I did in Photoshop was to add a Black, White Gradient Map adjustment layer. That resulted in a look similar to the simple desaturation above, but with a bit more contrast. Next I added a Levels adjustment and moved the right adjustment slider inward just a tiny bit to open up the image a bit; take away some of the contrast. I did this because I wanted to pop the model a bit.
But the above step with the Levels adjustment brighted everything up a bit which I don’t really want. So I added a Curves layer and brought the middle of the curve down a bit to darken everything. I then painted out the adjustment over the model with a large soft brush (softest brush available) and a flow of 1%. I’m not too careful with this, I just paint over her and let it vignette out a bit. I then did Image > Apply Image, and checked the Invert box to better blend the mask.
Next I added a couple of curves layers to dodge and burn some highlights and shadows on the model to give her a bit more contrast. Again, I applied these with the softest brush available at a 1% flow. After this step, the bulk of the conversion is finished. But there’s still a few steps to just tweak it to what I like.
I created a new layer with a soft light blending mode and 50% gray: Layer > New > Layer > Mode Soft Light > check the box, Fill with soft light natural color. Again I used the softest brush and set to a flow of 1% I painted white into the highlights in her hair just a bit and painted over her face to pop it a bit. I also painted black over her lips and eyebrows to darken them a bit and to add a bit of contrast.
I then added a Photo Filter adjustment layer, using Warming Filter (85) with a density of 15%. It’s very subtle but it adds just a tiny bit of warmth. Trust me, it’s very subtle, but makes a lot of difference aesthetically. Technically, at this point, it’s no longer a “black and white” image, but for all intents and purposes, it is. I like it.
The next step was to add a vignette. To do this I used the Elliptical Marquee tool to make a selection around the model. I then added a Curves layer, pulled down the middle of the curve to darken the image, and then inverted the mask. Next I then added a Gaussian Blur on the mask to blur the transition. I blurred it a lot. For this image it was a radius of 792.7. I moved the mask around a bit to set it where I liked it best; Ctrl + T > click and drag.
The final step is something that I do often with black and white images. I add just a tiny bit of noise because I feel that it gives it a more film-like look and it just ties everything together. I do this by creating a new layer and then Filter > Noise > Add Noise. For this image I set it the amount to 2% Gaussian and checked the Monochromatic box.
Watching some of the discussions over at the blithering pedantic nonsensical mess that is the DPReview forums is enough to make reasonable people’s heads explode regarding camera brands and their respective “color science” and how it affects photographers. Generally, how one brand handles its colors vs another is the last thing you should be thinking about. With few exceptions, camera brand color science doesn’t matter.
First off, “color science” doesn’t mean squat to the average photographer. Color science is a real science and it’s mostly relevant only for engineers that are developing systems to deal with colors (in a nutshell). When the average photographer goes on about “color science” they’re not really talking about color science. They’re probably talking about color theory. They are two different things all together.
Then you get people talking about how brand X’s “color science” is better than brand Y’s. Or how people prefer one brand’s handling of color over another. Looking at the DPReview forums you’ll see people go on and on and on ….. And on about it.
But it’s mostly bullshit.
For a pretty good rundown on camera color science and why camera brand color science doesn’t matter, this video is pretty good:
In fact the only time that it might matter is if you’re shooting JPEG only and you don’t post process your photos. Then you’re going to see different brands produce slightly different looking colors. But even then it’s not really a big deal. However, if you shoot raw and you post process your files it doesn’t matter at all.
Period. End. Of. Story.
The reason it doesn’t matter at all in this circumstance is because people generally post process their images to their personal tastes and what looks most pleasing to them. You can take different photos by different cameras (in raw) and simply setting a white balance will remove almost any perceptible differences. To further add to consistency you could create a profile for each camera with something like an X-Rite ColorChecker and it will remove any perceptible difference. I guarantee that if you have three different brands of cameras and profile them, then post process them to your tastes you will not see any perceptible difference in the colors.
Anyone who claims they can look at processed raw files from profiled cameras and see a difference are simply full of shit.
Period. End. Of. Story.
That’s why when you look at photos by famous photographers who have changed brands of cameras you’re not going to suddenly see that their photos look any different. It’s because they generally post process their images to their taste and what they like.
So, at the end of the day if you shoot raw and post process your images to your taste concerning yourself over a brand’s particular “color science” is the last thing you should worry about.