A lot of people may think to convert color photos to black and white using Photoshop that it’s as simple as sucking away all of the saturation. But it’s not that simple. At least not for me and what I like. You may like something else, but for me, an effective black and white conversion needs to be stylized to some degree. After all, by simply going the black and white route we’ve comfortably eschewed the realistic.
With few exceptions we all see the world in color.
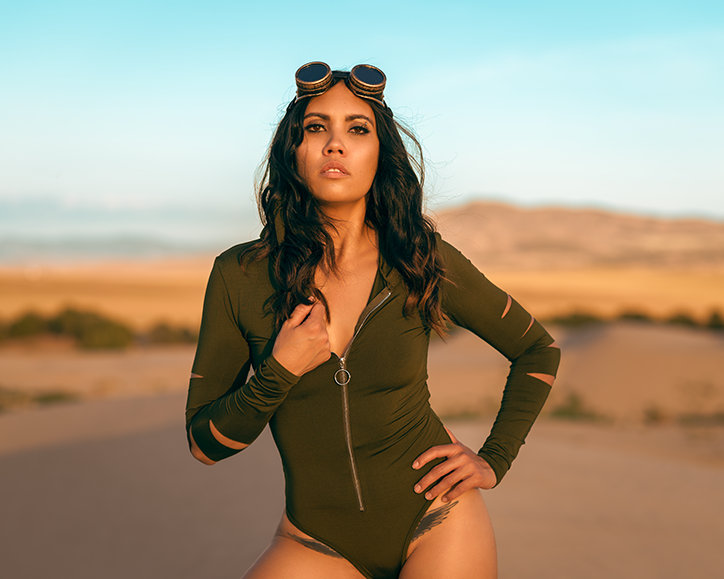
This photo originally began with the intention of it being color. That’s what I had in mind when I first set out to make it. Here is the original version after post processing:

I like it. It is what I originally had in mind; a sort of festival style fashion thing out in some rolling sand dunes. I like the colors and I love the skin tones of Analiza, the model, and how they tie in to the surrounding environment.
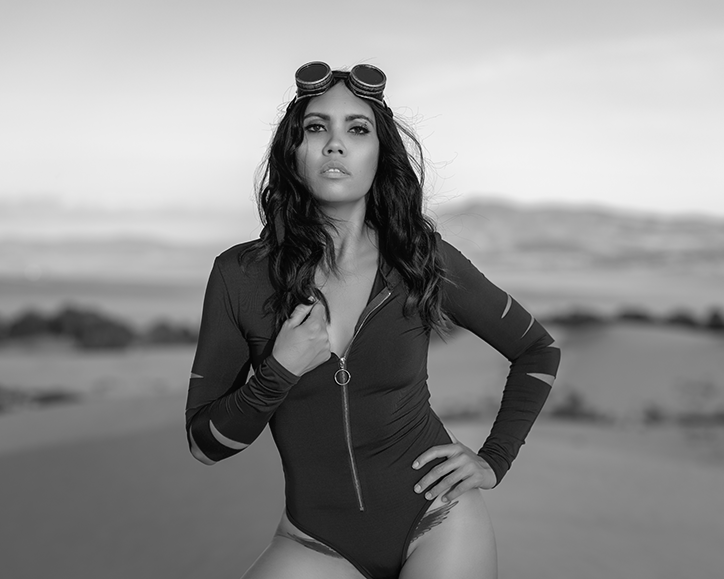
Then I thought about how it would look in black and white. The more I thought about it, the more I felt it could look great. But I knew it couldn’t just be a matter of simply converting the image to grayscale or dropping the saturation all the way to zero which results in an image like this:

To be honest, it’s not bad, but I don’t think it really pops. By that I mean there’s nothing really different about it other than it’s simply been desaturated to black and white.
Keep in mind that I’m not claiming this is the best way to convert images to black and white. There are a ton of ways of doing it and there are third party plug-in, too. This is just my way.
To convert the color image to black and white like I wanted, the first thing I did in Photoshop was to add a Black, White Gradient Map adjustment layer. That resulted in a look similar to the simple desaturation above, but with a bit more contrast. Next I added a Levels adjustment and moved the right adjustment slider inward just a tiny bit to open up the image a bit; take away some of the contrast. I did this because I wanted to pop the model a bit.
But the above step with the Levels adjustment brighted everything up a bit which I don’t really want. So I added a Curves layer and brought the middle of the curve down a bit to darken everything. I then painted out the adjustment over the model with a large soft brush (softest brush available) and a flow of 1%. I’m not too careful with this, I just paint over her and let it vignette out a bit. I then did Image > Apply Image, and checked the Invert box to better blend the mask.
Next I added a couple of curves layers to dodge and burn some highlights and shadows on the model to give her a bit more contrast. Again, I applied these with the softest brush available at a 1% flow. After this step, the bulk of the conversion is finished. But there’s still a few steps to just tweak it to what I like.
I created a new layer with a soft light blending mode and 50% gray: Layer > New > Layer > Mode Soft Light > check the box, Fill with soft light natural color. Again I used the softest brush and set to a flow of 1% I painted white into the highlights in her hair just a bit and painted over her face to pop it a bit. I also painted black over her lips and eyebrows to darken them a bit and to add a bit of contrast.
I then added a Photo Filter adjustment layer, using Warming Filter (85) with a density of 15%. It’s very subtle but it adds just a tiny bit of warmth. Trust me, it’s very subtle, but makes a lot of difference aesthetically. Technically, at this point, it’s no longer a “black and white” image, but for all intents and purposes, it is. I like it.
The next step was to add a vignette. To do this I used the Elliptical Marquee tool to make a selection around the model. I then added a Curves layer, pulled down the middle of the curve to darken the image, and then inverted the mask. Next I then added a Gaussian Blur on the mask to blur the transition. I blurred it a lot. For this image it was a radius of 792.7. I moved the mask around a bit to set it where I liked it best; Ctrl + T > click and drag.
The final step is something that I do often with black and white images. I add just a tiny bit of noise because I feel that it gives it a more film-like look and it just ties everything together. I do this by creating a new layer and then Filter > Noise > Add Noise. For this image I set it the amount to 2% Gaussian and checked the Monochromatic box.
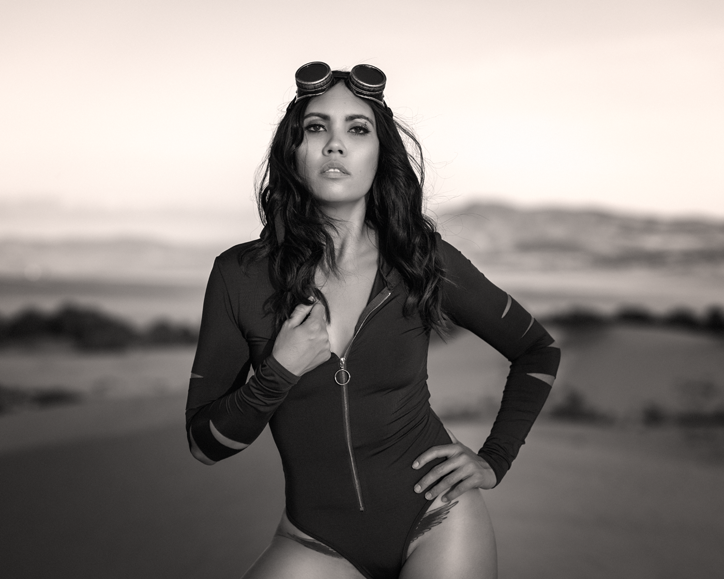
That’s it. The final result is this:
